あくまで実験です。当該PCに課されたセキュリティポリシ違反をする目的ではありません。
なお、同一LAN内のプロキシサーバの利用にアクセス制限をかけられていないことが前提になります。
ubuntu/squidのdockerイメージを利用。
docker-compose.yml はこんな感じ。
===
version: '3'
services:
  squid:
    container_name: squid-container
    hostname: squid
    image: ubuntu/squid:5.2-22.04_beta
    environment:
      TZ: Asia/Tokyo
    volumes:
      - /data/docker/squid/var/log/squid:/var/log/squid:rw
      - /data/docker/squid/var/spool/squid:/var/spool/squid:rw
      - /data/docker/squid/etc/squid/squid.conf:/etc/squid/squid.conf:ro
    ports:
      - 8081:3128/tcp
    restart: always
===
squid.conf はこんな感じ。
===
acl all src 0.0.0.0/0.0.0.0
acl all_dst dst 0.0.0.0/0.0.0.0
acl localhost src 127.0.0.1/32
acl to_localhost dst 127.0.0.0/8
acl localsubnet src 192.168.0.0/16
#
acl SSL_ports port 443
acl Safe_ports port 80		# http
acl Safe_ports port 21		# ftp
acl Safe_ports port 443		# https
acl Safe_ports port 1025-65535	# unregistered ports
acl CONNECT method CONNECT
#
acl local-servers dstdomain .localdomain
acl local-host dst 127.0.0.0/255.0.0.0
acl local-a dst 192.168.0.0/255.255.0.0
#
http_access deny !Safe_ports
http_access deny CONNECT !SSL_ports
http_access deny to_localhost
http_access allow localhost
http_access allow localsubnet
http_access allow all_dst
http_access deny all
#
# Only allow cachemgr access from localhost
http_access allow all manager
http_access deny manager
#
icp_access deny all
#
http_port 3128
#
always_direct allow local-servers
always_direct allow local-host
always_direct allow local-a
#
no_cache deny all_dst
#
logformat timefm %{%Y/%m/%d %H:%M:%S}tl %ts.%03tu %6tr %>a %Ss/%03>Hs %<st %rm %ru %[un %Sh/%<a %mt
#
#access_log none
#access_log /var/log/squid/access.log
access_log /var/log/squid/access.log timefm
cache_log /var/log/squid/cache.log # can't be none
#cache_log /dev/null
cache_store_log none
#
forwarded_for off
header_access X-Forwarded-For deny all
header_access Cache-Control deny all
via off
===
下記で起動
# cd <docker-compose.ymlを置いたフォルダ>
# docker-compose up -d
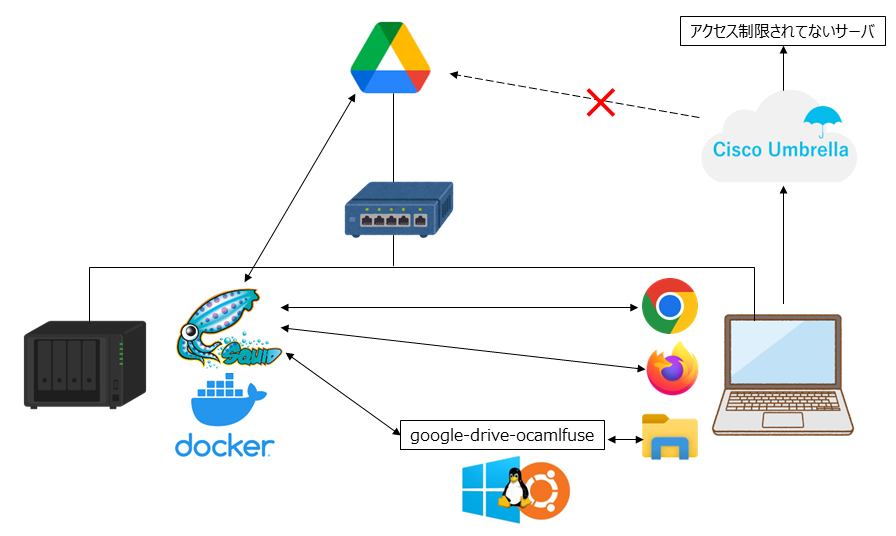
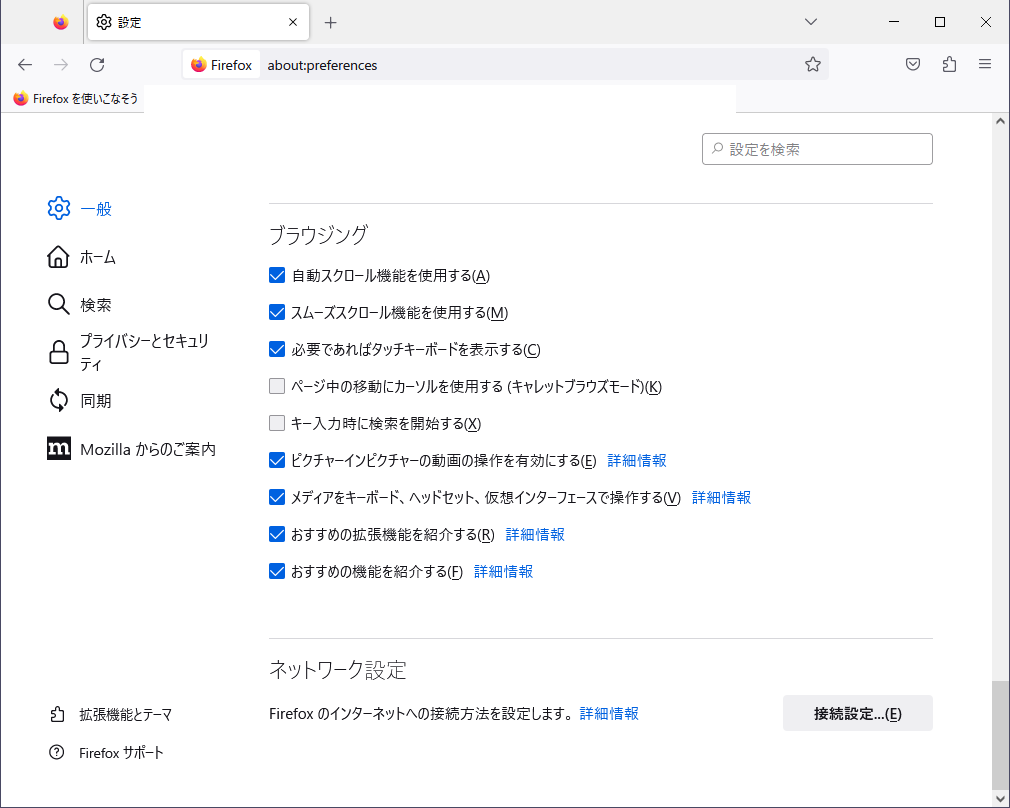
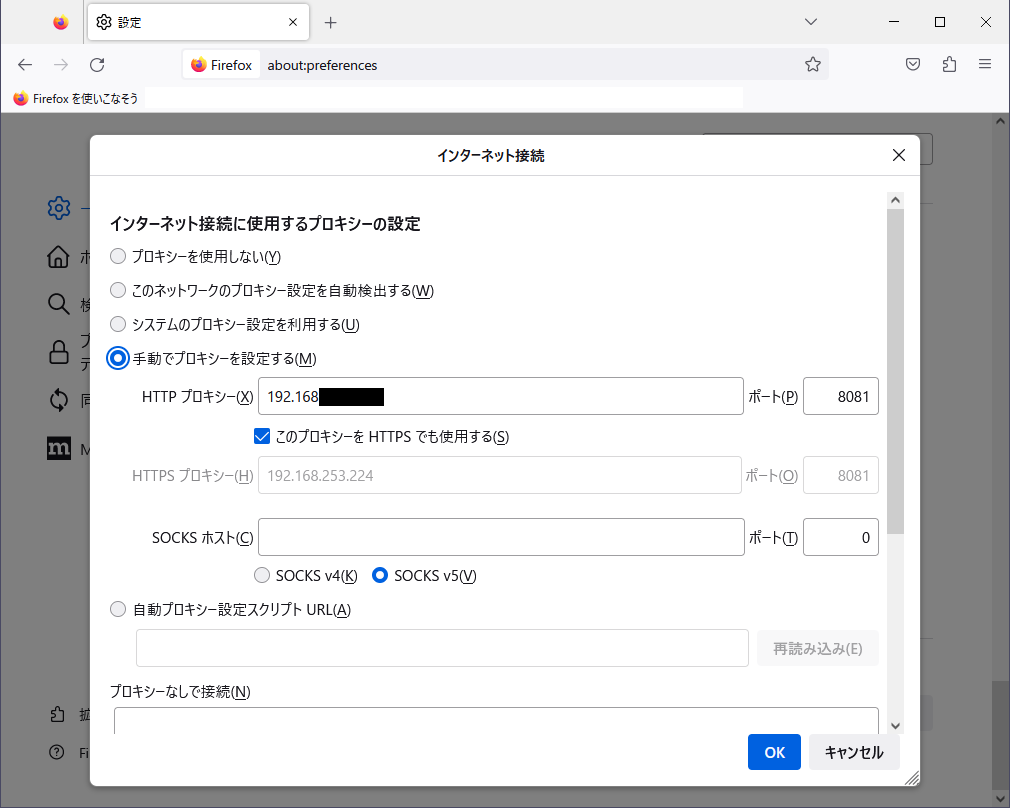
Windows10 PCのWebアクセスのプロキシ設定とは独立に、ブラウザにプロキシサーバの指定を設定。
パソコン版 Google ドライブは、Windows10 PCのWebアクセスのプロキシ設定と独立にプロキシ設定ができない。
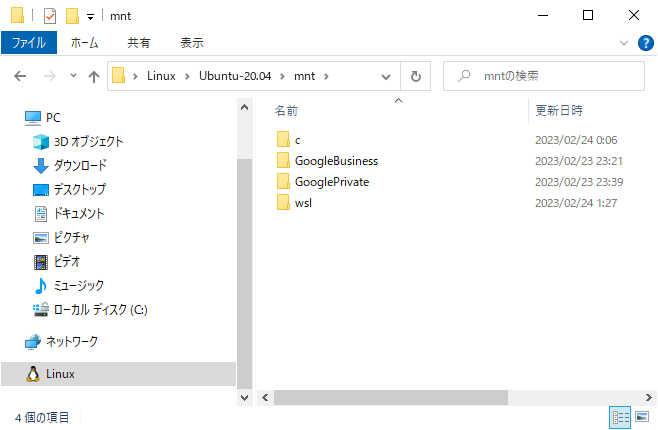
そこで、PC上のWSL2環境にUbuntu等を構築し、Ubuntu等内でGoogleドライブをプロキシ経由でマウントして使う。Ubuntu等内でマウントしたディレクトリは、Windows側のエクスプローラでもアクセスできる。
構築方法はググればすぐ出てくると思うので、詳細割愛。
google-drive-ocamlfuseはLinux上でGoogleドライブをマウントするツールです。ファイル同期はしないのでローカルのストレージ容量を圧迫しませんが、都度都度、インターネットを経由してファイルを取得・反映するので、少し重い・遅い場合があります。
構築方法は、このへんを参考にしました。
$ sudo apt install software-properties-common
$ sudo add-apt-repository ppa:alessandro-strada/ppa
$ sudo apt update
$ sudo apt -y upgrade
$ sudo apt install google-drive-ocamlfuse
$ sudo vi /usr/local/bin/xdg-open
下記を入力
===
#!/bin/bash

echo $* > /dev/stderr
===
$ sudo chmod +x /usr/local/bin/xdg-open
$ sudo su
# vi /etc/fuse.conf
ファイル末尾の「user_allow_other」がコメントアウトされてるので、コメントを外す
# mkdir -p /mnt/GooglePrivate
# mkdir -p /mnt/GoogleBusiness
# chmod 777 /mnt/GooglePrivate
# chmod 777 /mnt/GoogleBusiness
# export http_proxy=192.168.xxx.xxx:8081
# export https_proxy=192.168.xxx.xxx:8081
# google-drive-ocamlfuse -o allow_other -label GooglePrivate /mnt/GooglePrivate
# ls -al /mnt/GooglePrivate
# ls -al /mnt/GoogleBusiness
マウントできていることを確認(ネットワーク遅延が少しある)
# vi /usr/bin/gdfuse
下記を入力
===
#!/bin/bash

export http_proxy=192.168.xxx.xxx:8081
export https_proxy=192.168.xxx.xxx:8081

/usr/bin/google-drive-ocamlfuse -label $1 $*
exit 0
===
# chmod 755 /usr/bin/gdfuse
# vi /etc/fstab
下記2行を追加
===
gdfuse#GooglePrivate /mnt/GooglePrivate fuse uid=0,gid=0,allow_other,user,_netdev,nonempty 0 0
gdfuse#GoogleBusiness /mnt/GoogleBusiness fuse uid=0,gid=0,allow_other,user,_netdev,nonempty 0 0
===
# exit
$ sudo fusermount -u /mnt/GooglePrivate
$ sudo fusermount -u /mnt/GoogleBusiness
$ ls -al /mnt/GooglePrivate
$ ls -al /mnt/GoogleBusiness
アンマウントされていることを確認(ls -alコマンドで何も表示されないことを確認)
$ sudo mount -a
$ ls -al /mnt/GooglePrivate
$ ls -al /mnt/GoogleBusiness
マウントできていることを確認(ネットワーク遅延が少しある)

なお、アンマウントは下記。
$ sudo su
# fusermount -u /mnt/GooglePrivate
# fusermount -u /mnt/GoogleBusiness

もし、アカウント選択をやり直す場合は、下記。
# rm -rf ~/.gdfuse
# google-drive-ocamlfuse -o allow_other -label GooglePrivate /mnt/GooglePrivate
以降のブラウザでの操作は同様。
あとは必要に応じて、フォルダのショートカットを作るなり、ネットワークドライブに割り当てるなり。